

🔖 Introducing Saved Views on embolt.app
Save your favorite filters and streamline how you get insights from your members.

We're excited to announce the launch of our new Saved Views feature! Saved Views allow you to preserve your customized member filters and sorting preferences for quick access in the future:
When working with large datasets in our application, you often need to filter and sort information in specific ways to find what you're looking for. With Saved Views, you can now save these customized views with a name of your choice and instantly return to them whenever needed.
The feature includes two types of views:
Personal Views: These are views you can create and are only visible to you
Global Views: These are views created by the embolt team that everyone can access
Why Saved Views Are Useful
Saved Views dramatically improve your workflow efficiency in several ways:
Save Time: No more recreating the same filters and sorting options every time you need to see specific data
Maintain Consistency: Ensure you're always looking at data through the same lens when making regular reports or analyses
Reduce Errors: Eliminate the risk of forgetting a filter parameter when setting up complex queries
Share Insights: Administrators can create global views that standardize how everyone in your organization views important data
Streamline Workflows: Quickly switch between different data perspectives with a single click
For teams that regularly analyze member data with specific criteria, Saved Views transform what used to be a multi-step process into a single click operation.
How to Create Your Own Saved Views
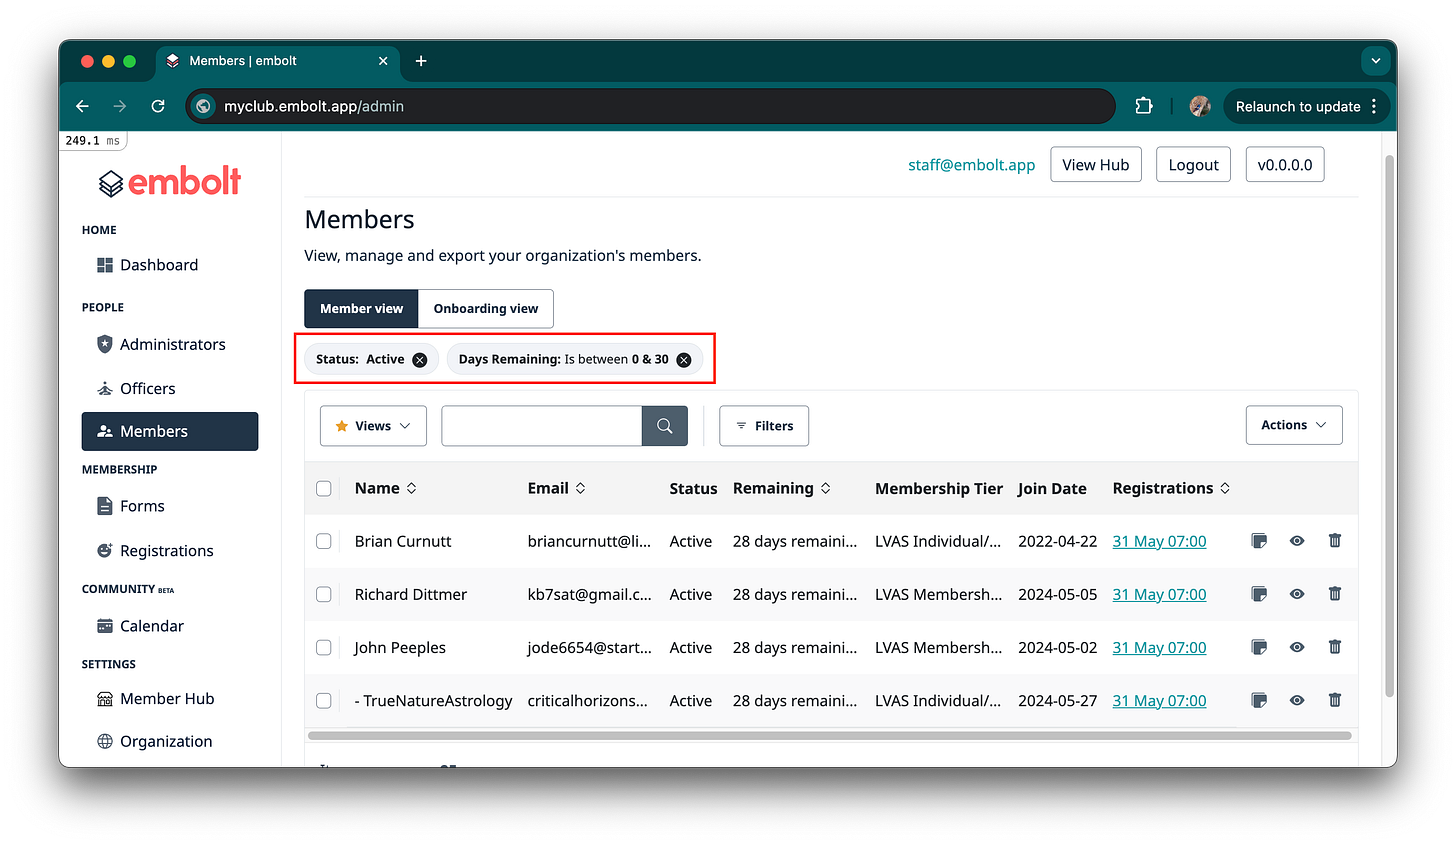
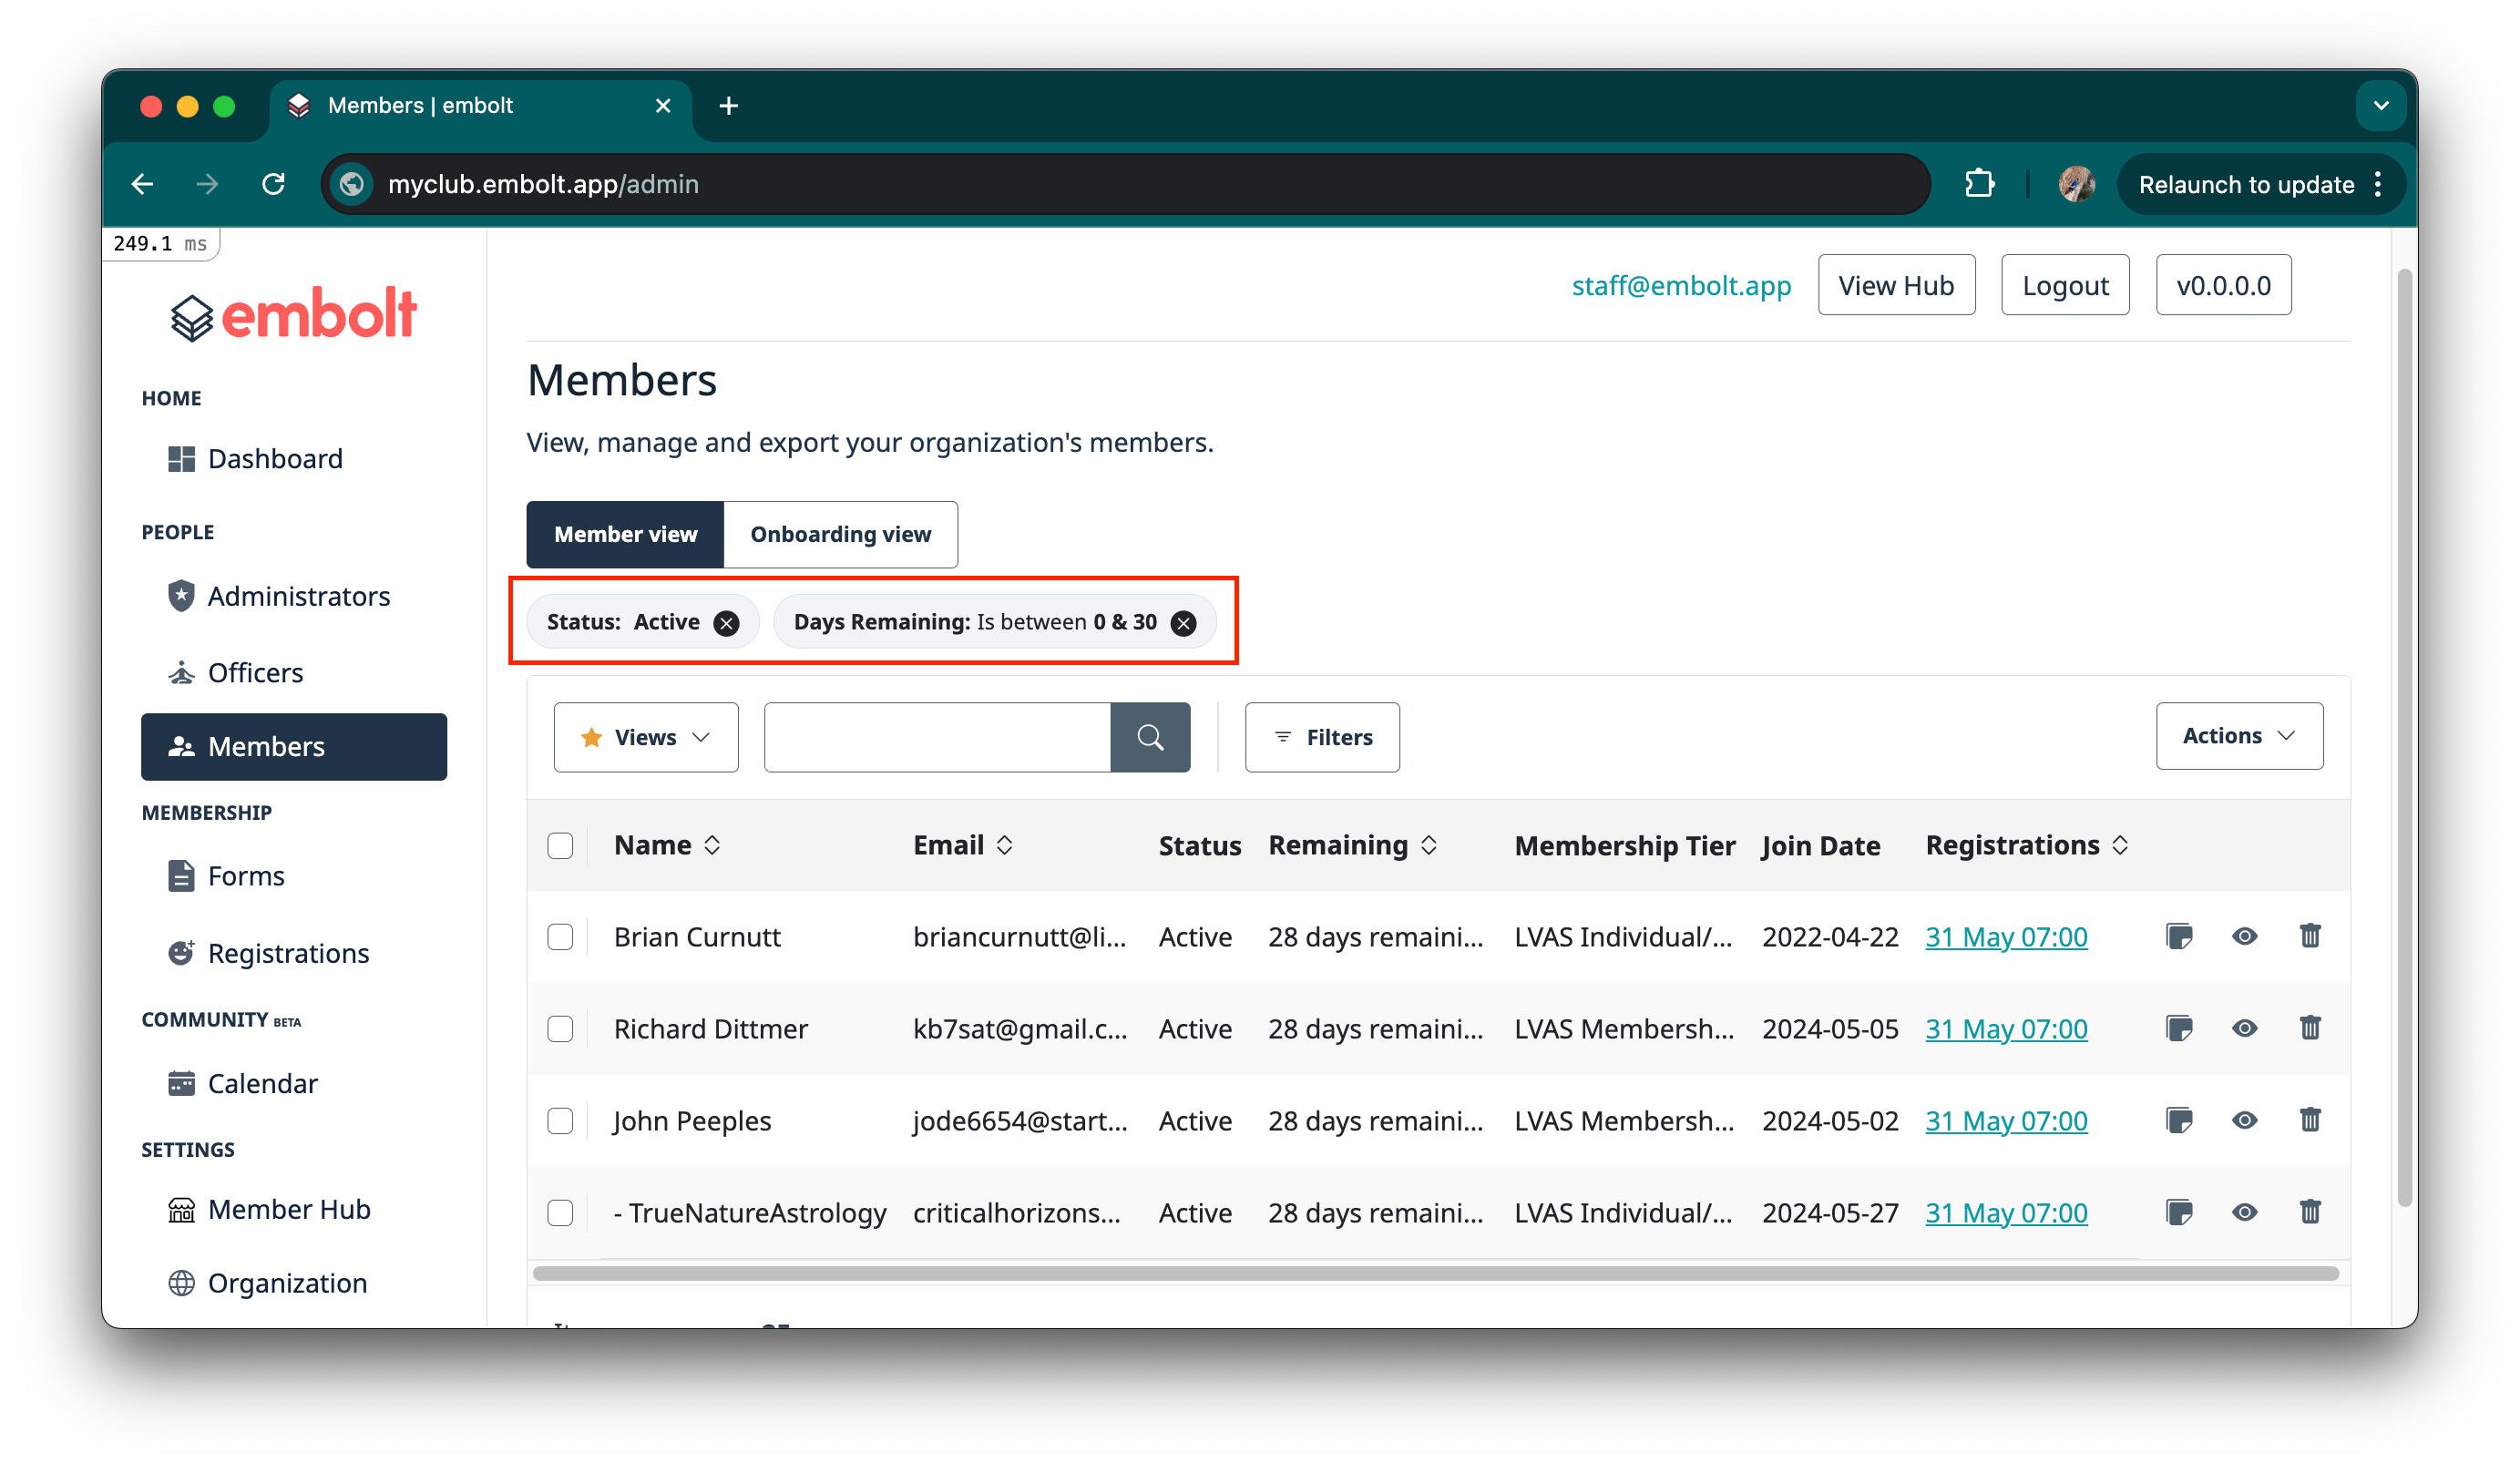
Set Up Your Filters:
Navigate to any table view in the admin area
Click the "Filters" button to open the filters modal
Configure your desired filters (e.g., status, date ranges, categories)
Click "Add Filters" to apply them
Add Search Terms (Optional):
Use the search bar to further refine your results
Your search terms will be saved as part of the view
Sort Your Results (Optional):
Click on column headers to sort the data as needed
Both your filters and sorting preferences will be saved
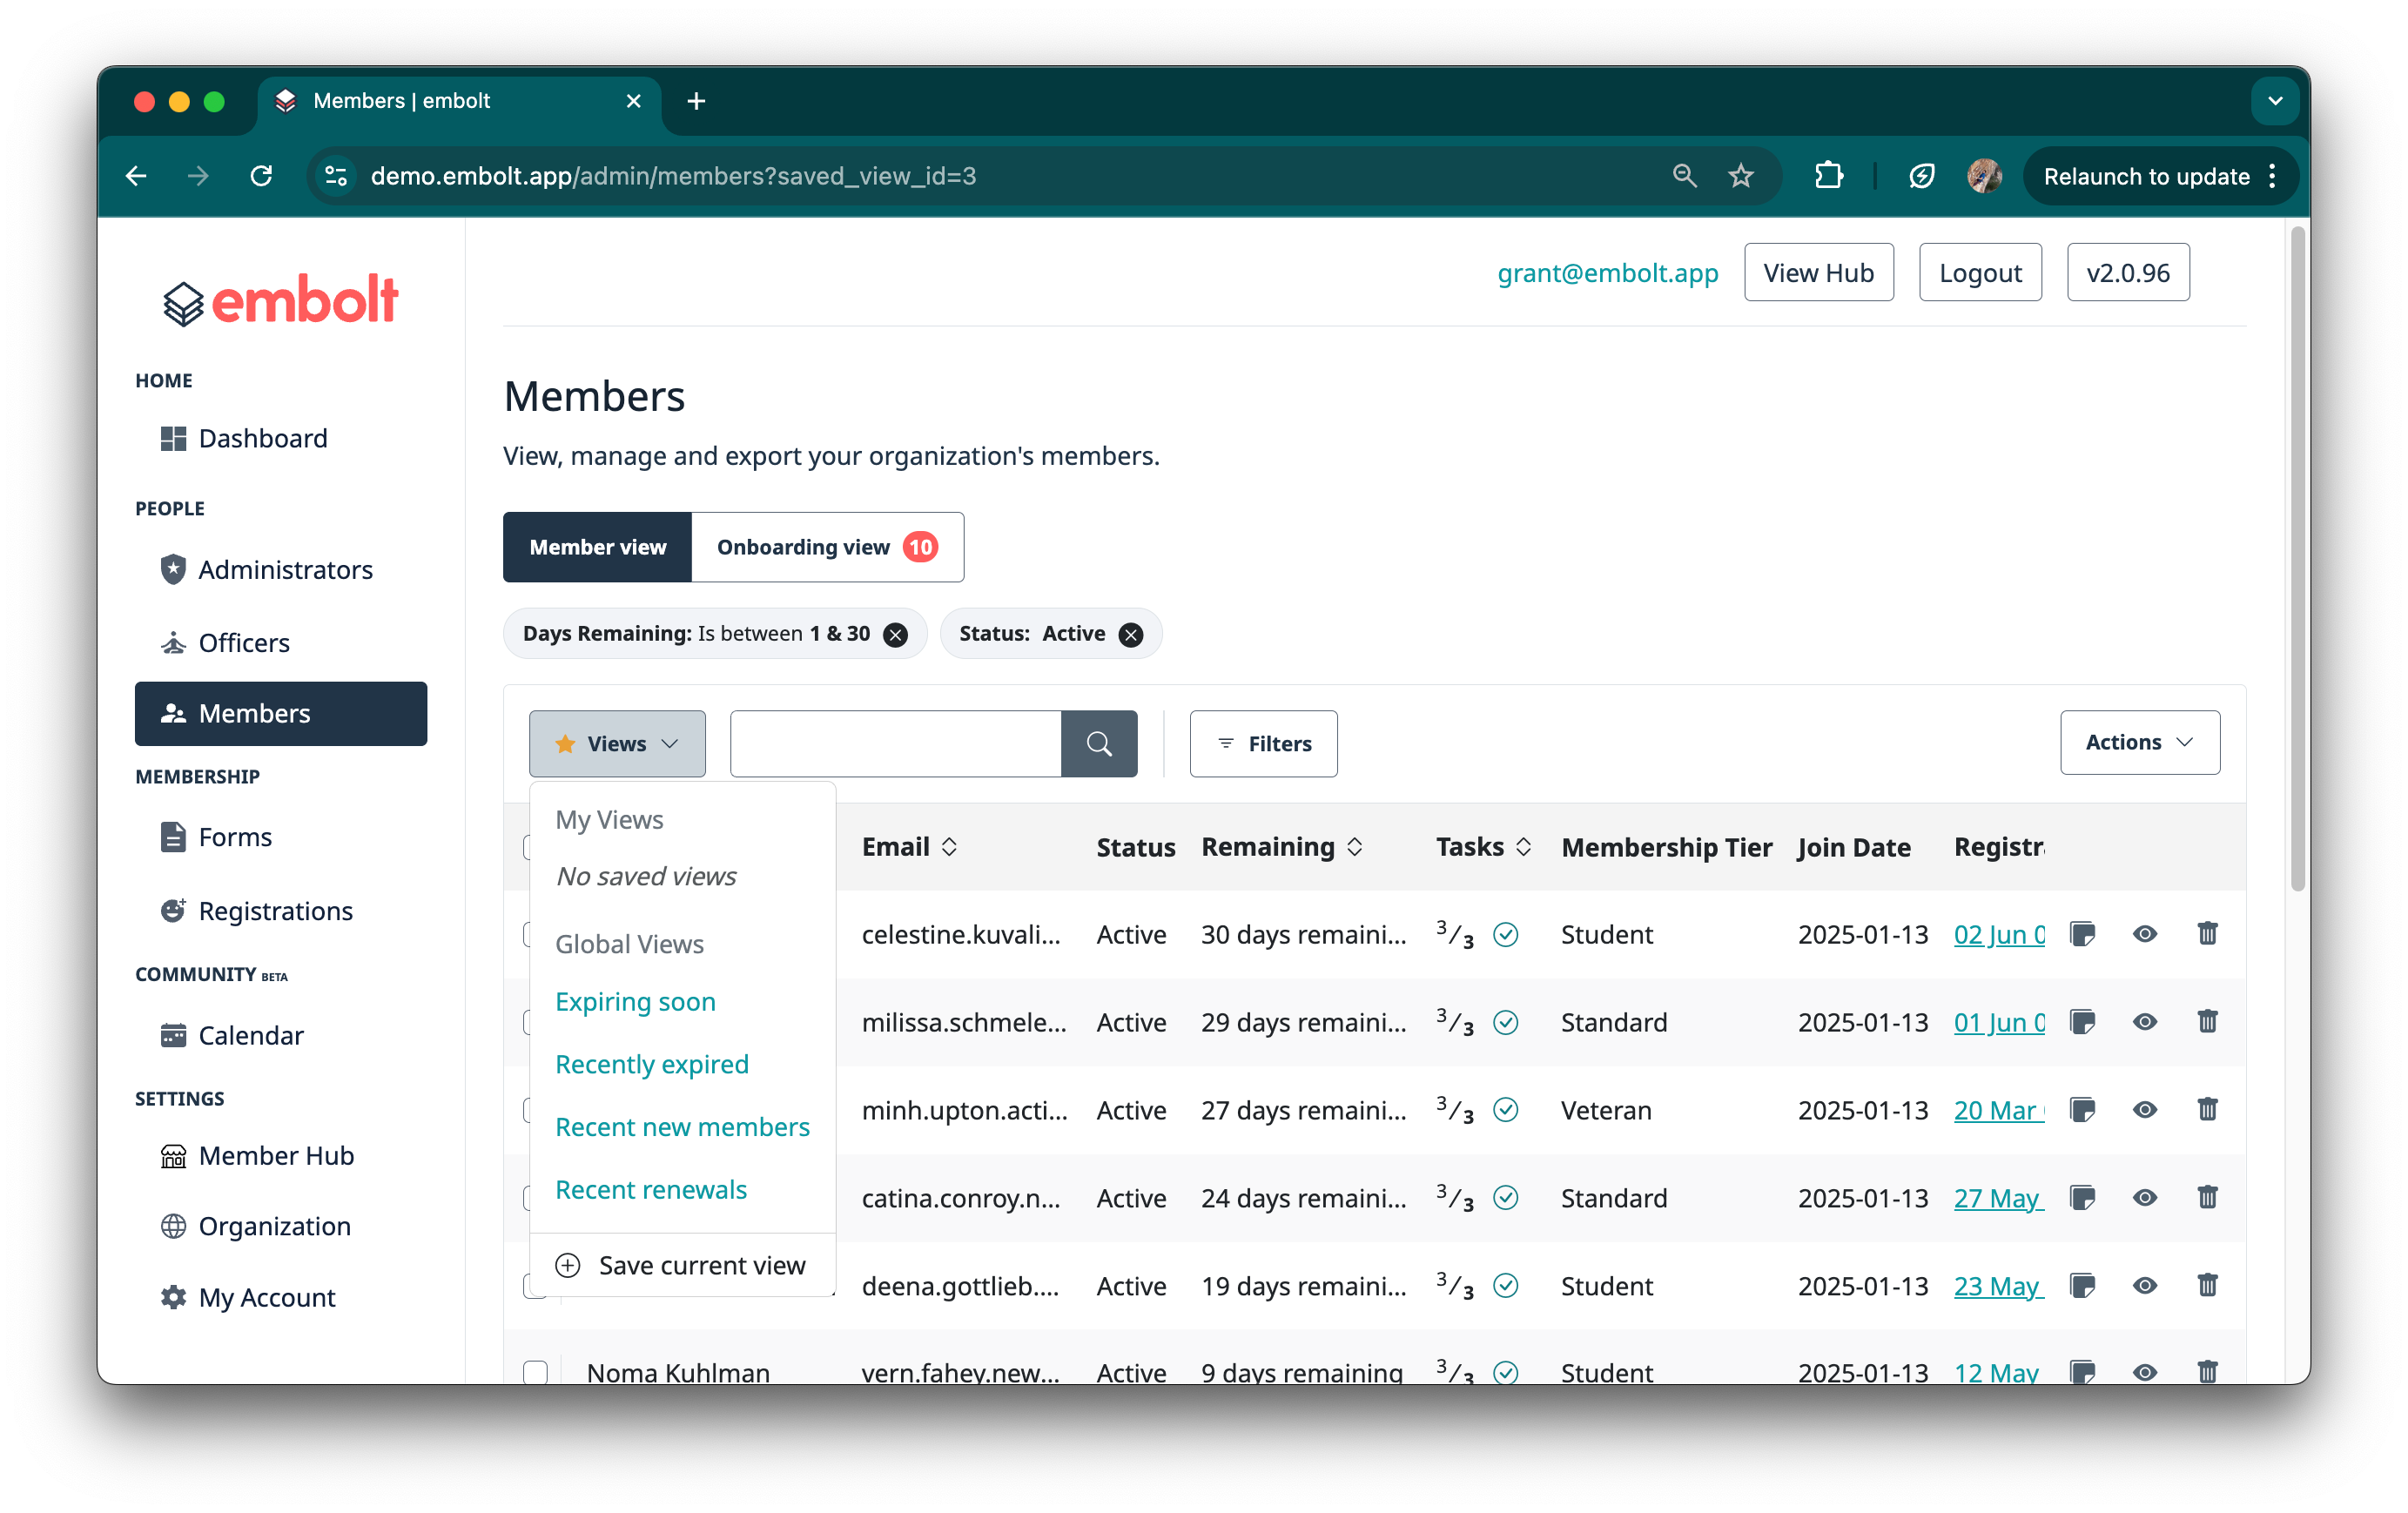
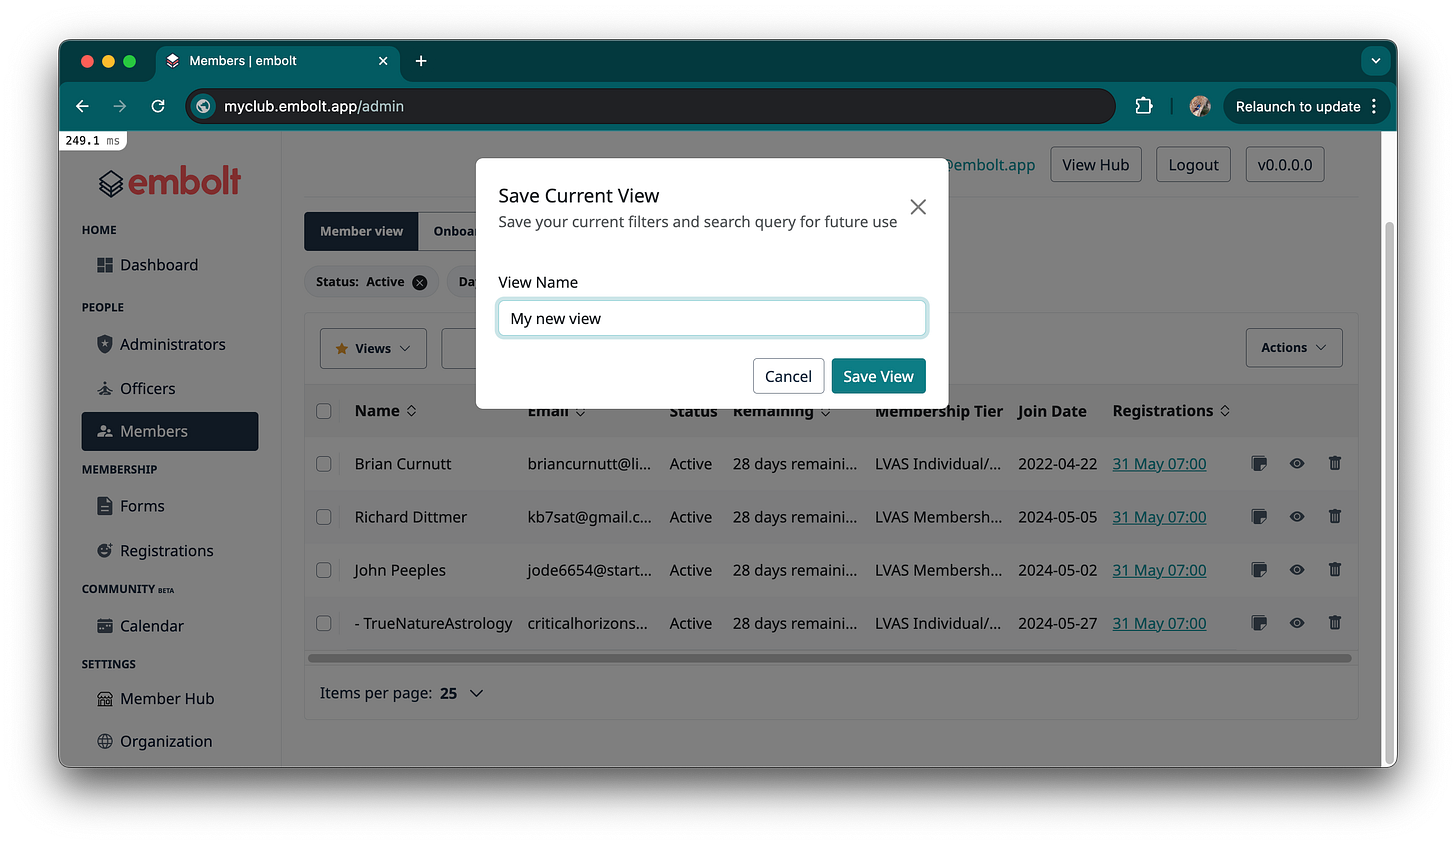
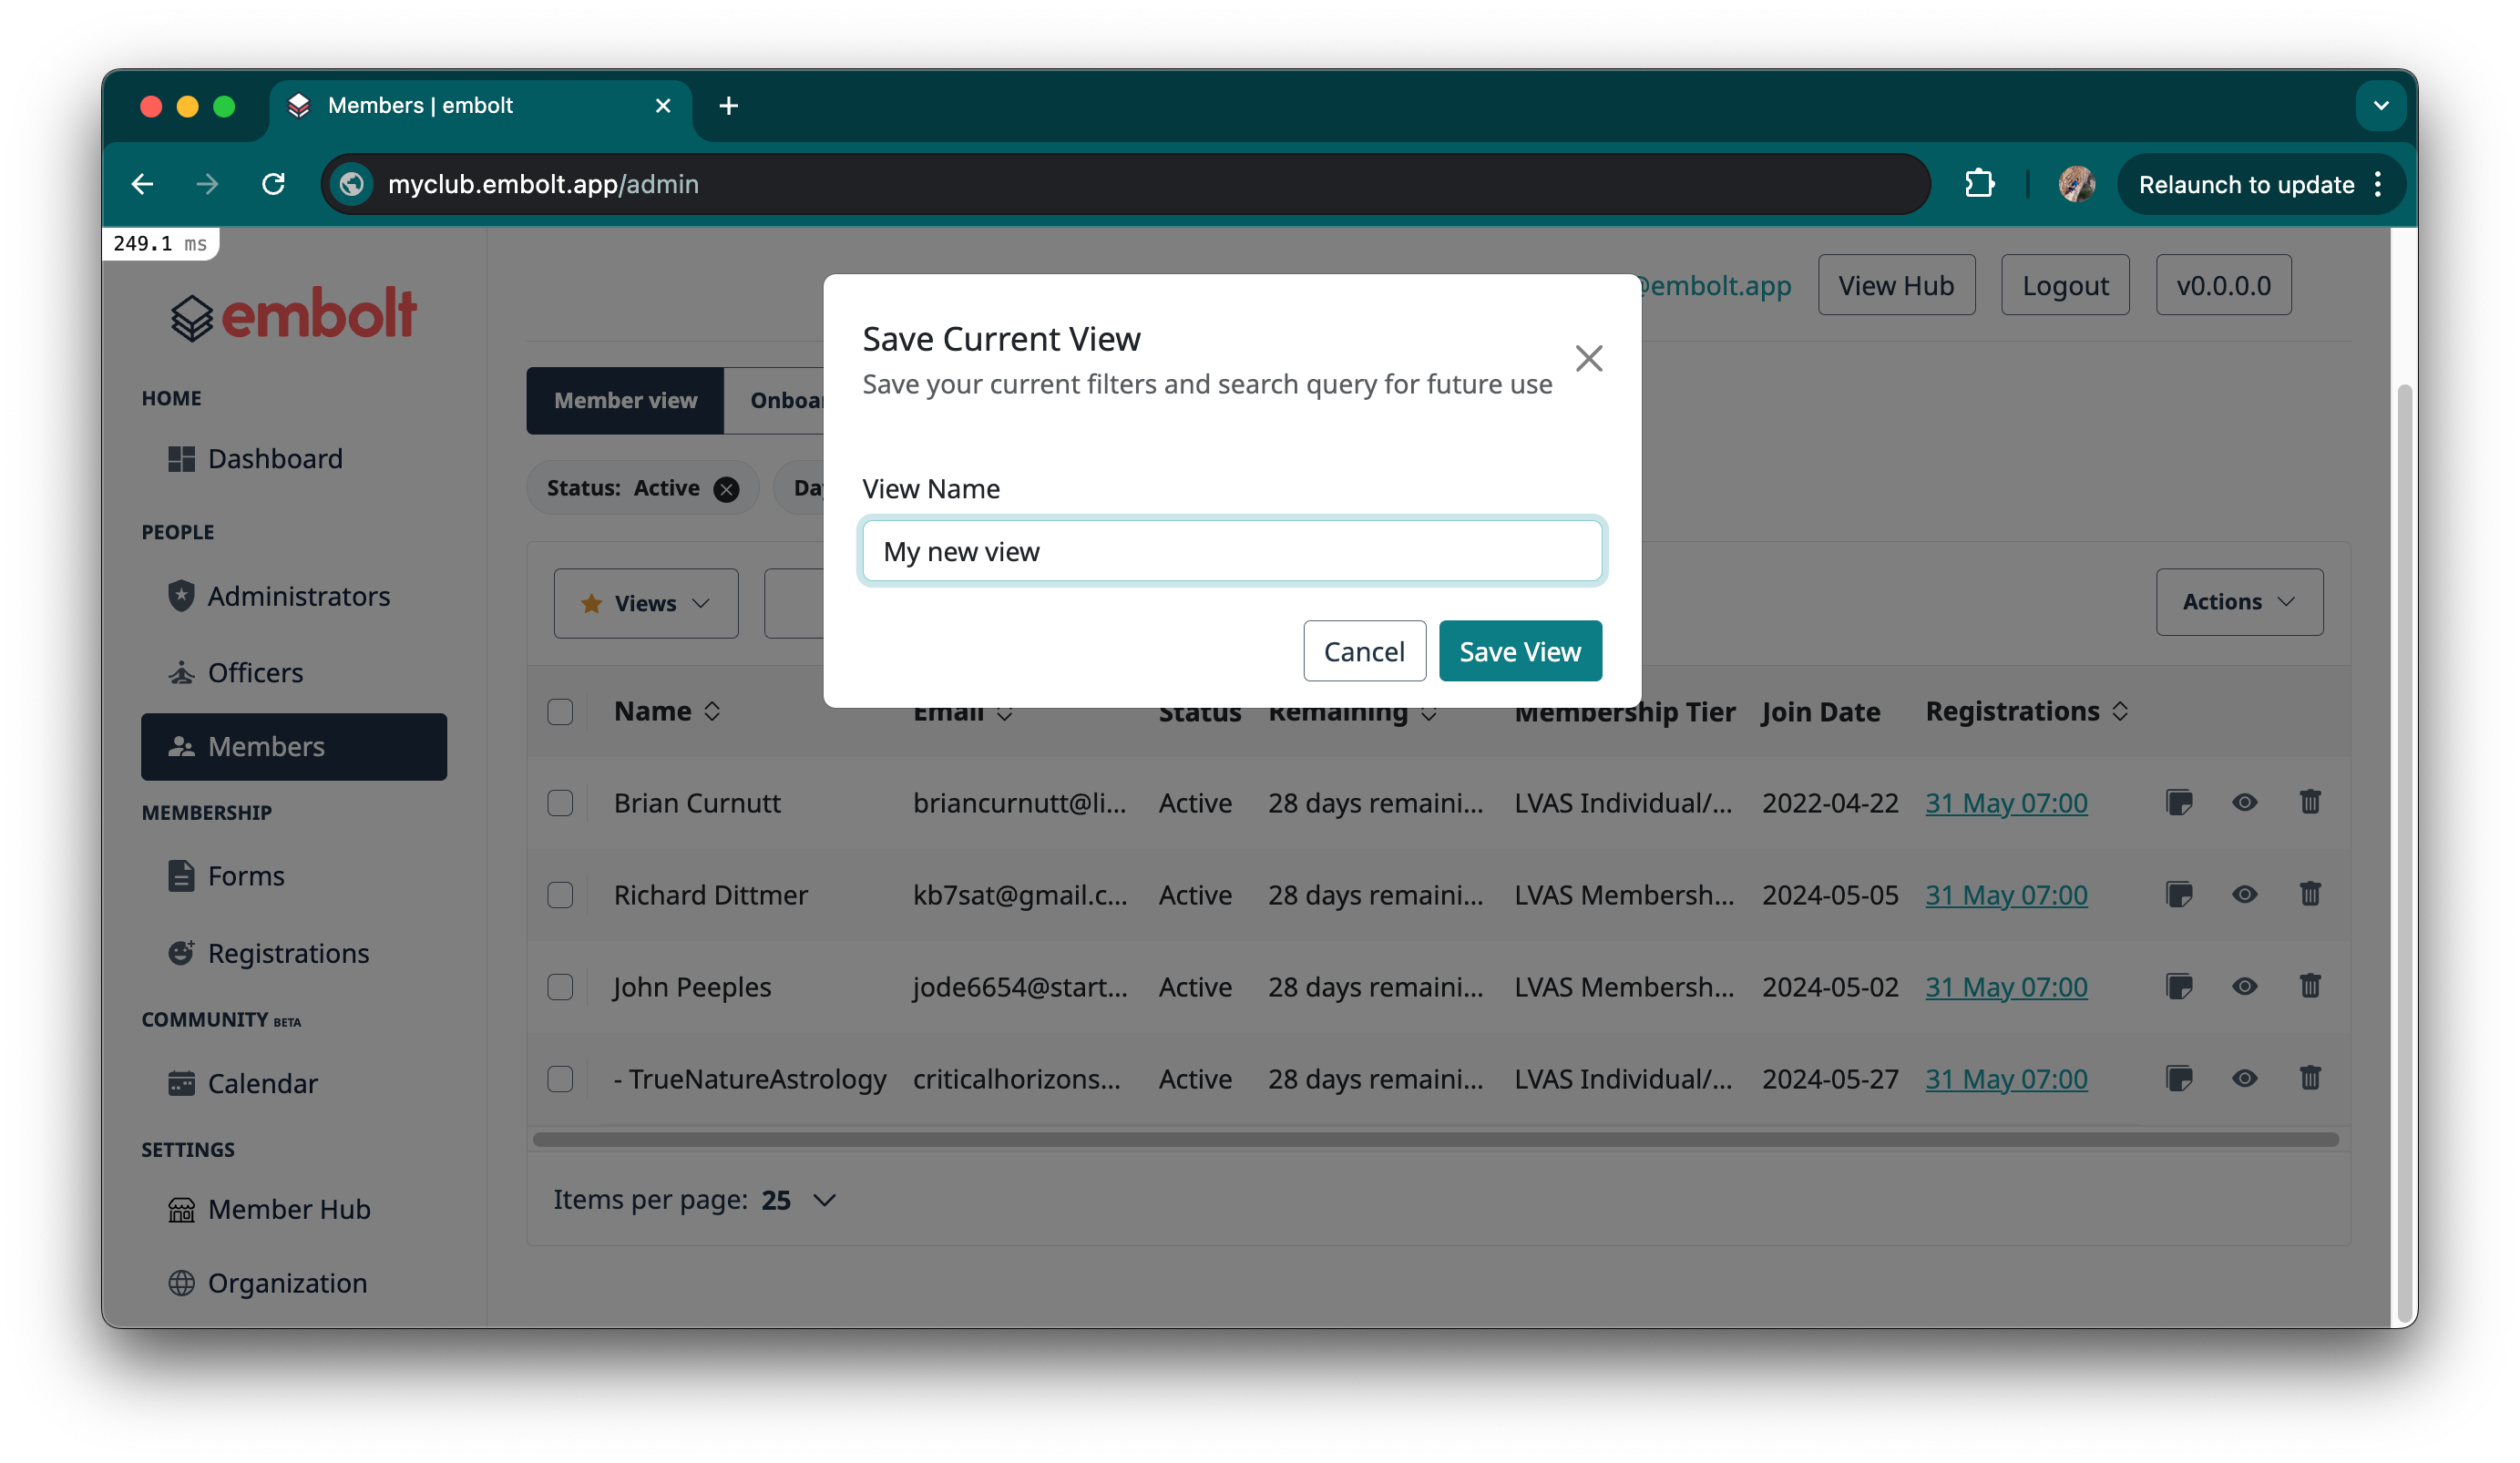
Save Your View:
Click on the "Views" dropdown button (with the star icon)
Select "Save current view" at the bottom of the dropdown menu
In the modal that appears, enter a descriptive name for your view
Click "Save View"
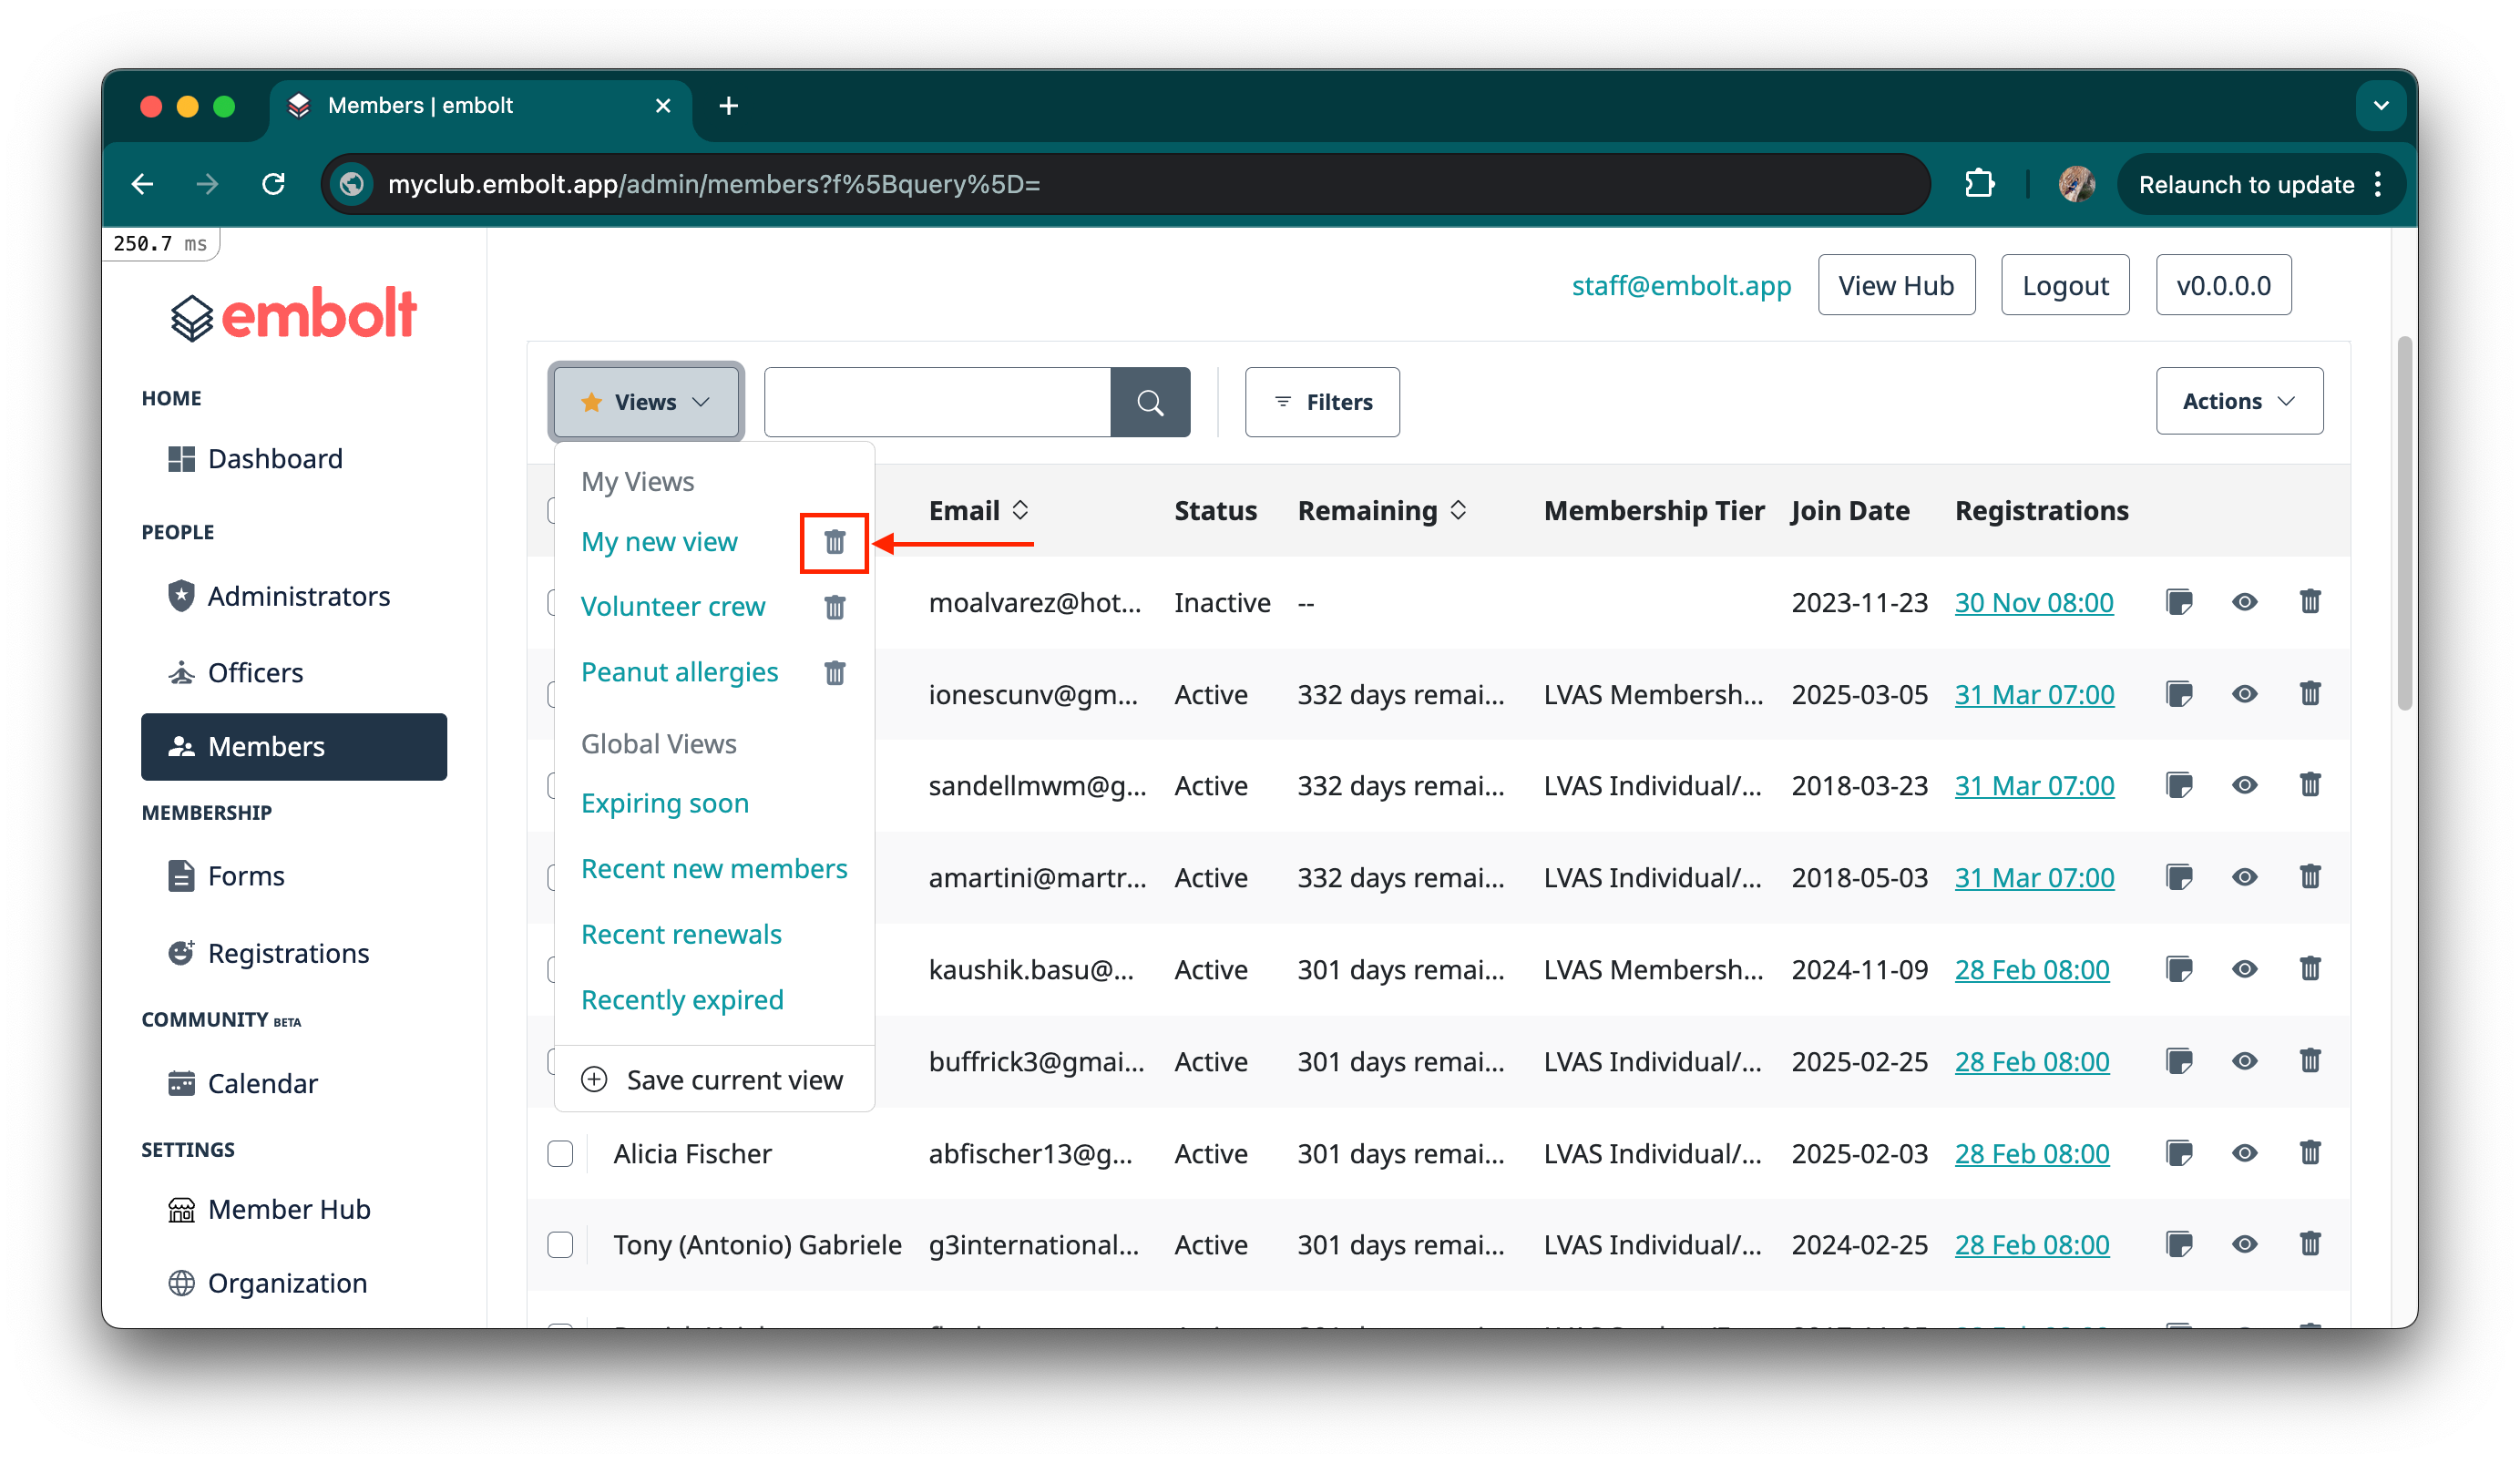
Access Your Saved Views:
To use a saved view, click the "Views" dropdown button
Your personal views will appear at the top under "My Views"
Global views created by administrators will appear under "Global Views"
Click on any view name to instantly apply those filters and sorting options

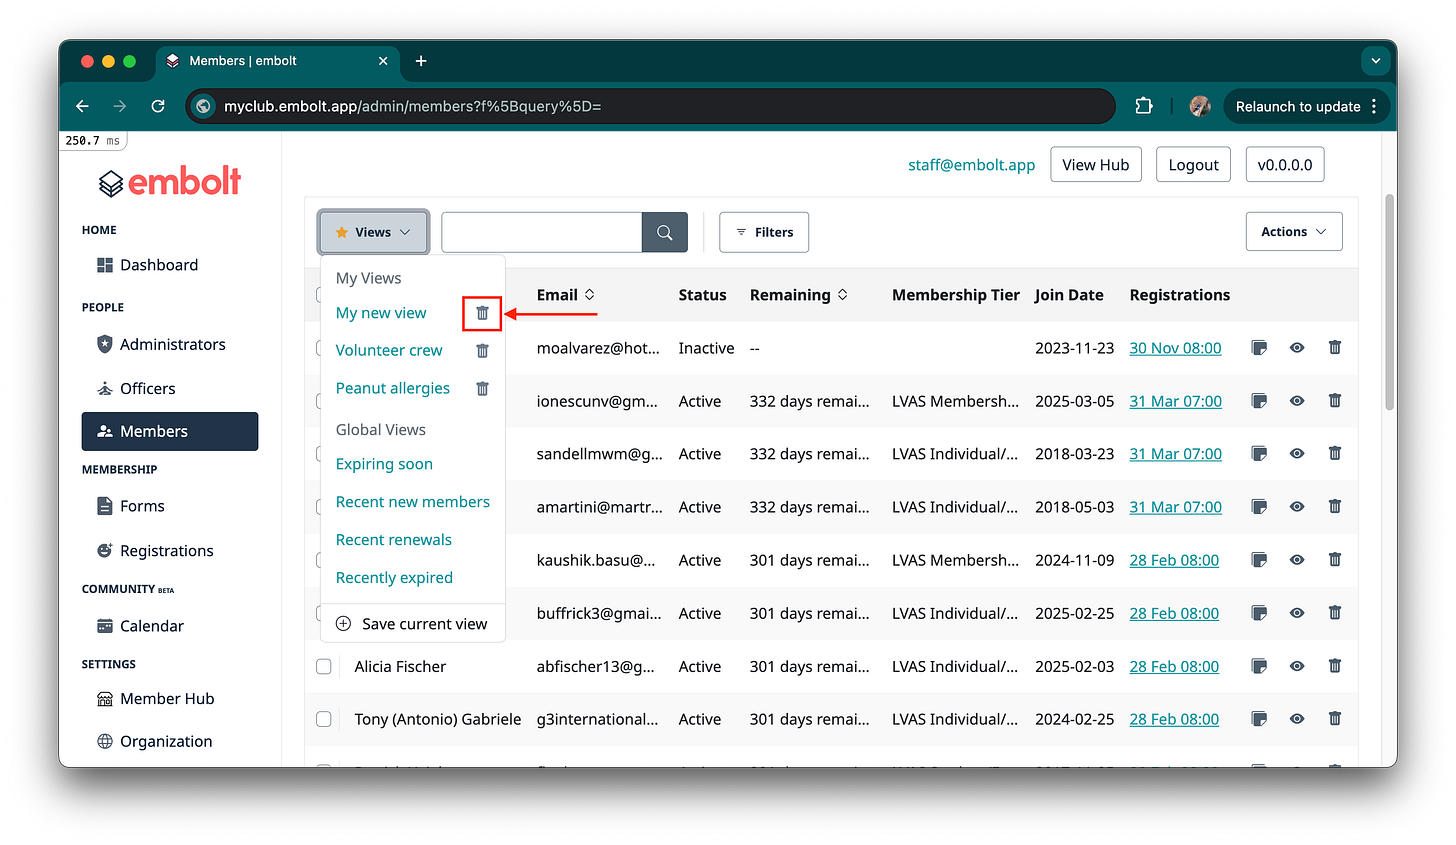
Delete a View:
To remove a personal view you no longer need, click the trash icon next to the view name in the dropdown
Confirm deletion when prompted

We hope this new feature helps streamline your workflows and makes navigating our application even more efficient. As always, we welcome your feedback on this and all our features.